Let’s get to know about Facebook ads for lead generation and what is conversion tracking in FB ads. Just consider an advertising tool, a tool that helps you to reach your audience or customers based on what they like, their interest, and their behavior.
Facebook can work as an advertising tool that helps you save your time and money by presenting your ads in front of viewers for conversion. Using Facebook ads for lead generation can scale your business X times.

It’s all possible with the network of Facebook through Facebook advertising.
The platform seems to be so overwhelming because of the vast number of users they have. However, once you get the idea of Facebook marketing surely you will be upscaling like a rocket in your niche. Almost every business is using Facebook ads for lead generation to grow their customer base.
Also, Many e-commerce entrepreneurs and small business owners starting out with a small advertising budget or big budgets prefer using Facebook ads for lead generation.
Why Facebook ads for lead generation?
There are a lot of good reasons for you to choose Facebook ads for lead generation.
Mainly, there are over 2.5 billion active users on Facebook. In which you can find your ideal customer just by choosing the right options. And the immense customization they are giving over the ad creative is quite appreciable.
Facebook ads are connected to Instagram as well as messenger ads. In addition to that, the good part is that you can run them in a single campaign. However, there are people who worry that the cost of the ads is higher. But in reality, Facebook ads are much economical than the ads that are offered by other platforms.
The good thing about using Facebook ads for lead generation is that the users on FB are sharing their information, such as interest, stories, place, and a whole lot more. You can target them based on the information provided by them. Facebook has a specific algorithm to study their user’s behavior which is a huge advantage while targeting.
Step by step guide for running Facebook ads for lead generation
Given below are the steps followed for running a Facebook ad.
Follow the below-given steps to create the advertisement that you wish to have in your own preference.
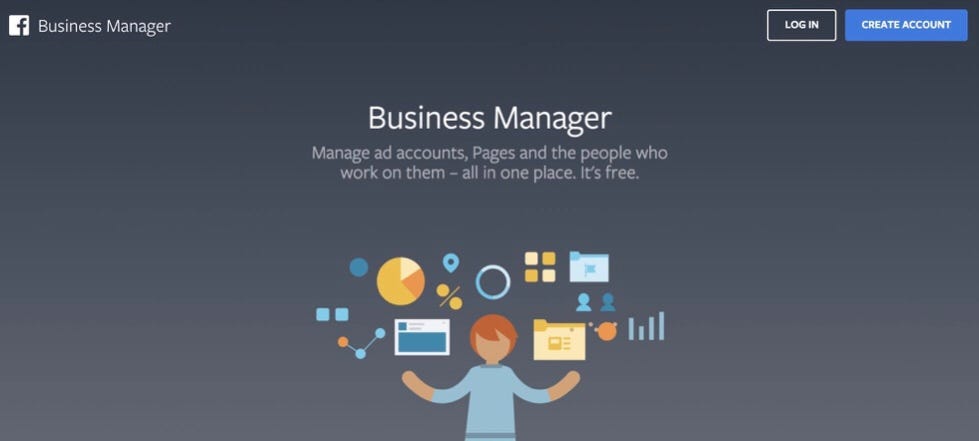
Step 1: Creating your Facebook business manager account
Firstly, the business manager is the section of Facebook that will have your Facebook ad account for advertising.
However, Setting up your Facebook business manager is one of the crucial steps in Facebook advertising.
You won’t be able to run ads unless you do the process of creating your business manager precisely as possible.
Also, For this, you will need a business page ( create a business page if you don’t have one), and a business account.
And once you have entered the business manager add or create an ad account for your business from the business settings.
Also, if you don’t already have an ad account, you are free to create a new one for yourself.
Step 2: Setting up your Facebook pixel
Secondly, A Facebook pixel is a generated code that stores data through which you know whether you have done any sales on your website by an ad.
Pixel code is generated by the business manager account for tracking data.
Therefore, pixel is inserted to your website or landing page.
And overall, this tracks the actions done by the audiences who visit your website.
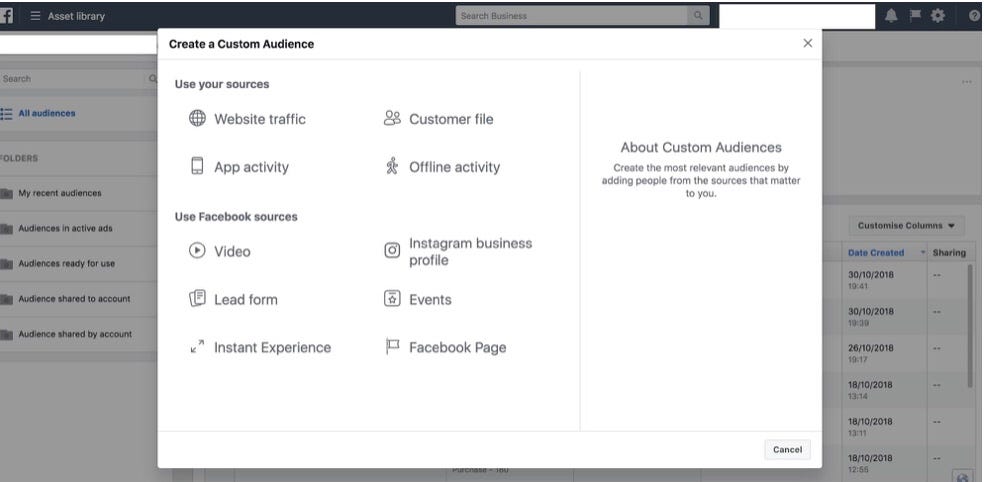
Step 3: Creating custom audience
Another step is creating a custom audience for having the whole control over.
Based on the audiences who have visited your page, and who did not visit, how much time they spent on your page, the actions they took on the page, etc., a report gets calculated later.
For creating the custom audience select the audience option on the business manager, then on the audience choose the custom audience.
However, In the custom audience, there are different kinds of audiences. This can be used for retargeting a specific audience that you have identified so that you can generate more sales.
The lookalike audience is people who have similar interests. Lookalike audiences are warm audiences and they are very likely to get converted because these people have the same interest as the conversions that you had before.
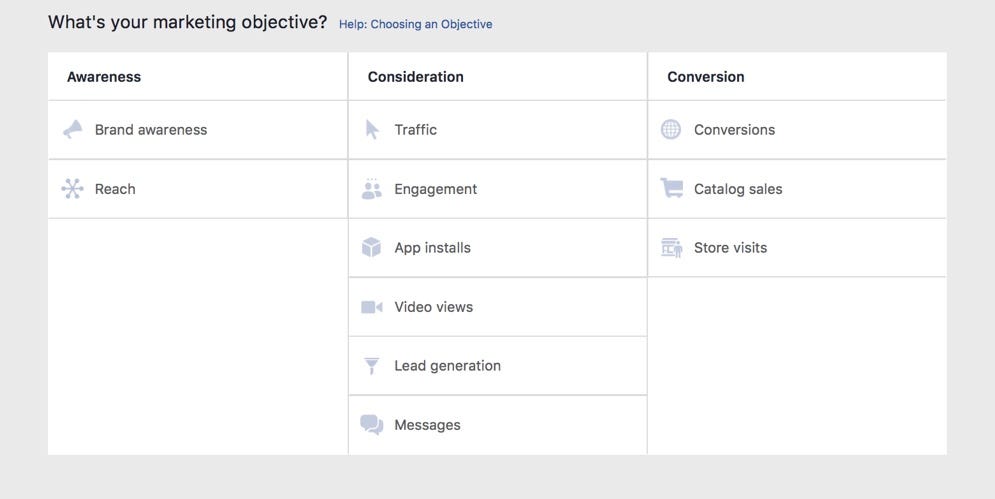
Step 4: Creating your Facebook campaign
The very first thing that you’ll be doing when you are creating your campaign is to choose your objective.
Choosing the objective is a very important aspect because Facebook optimizes ad placement based on your objective.
And within each campaign, there is an advertisement set. This is where you choose your audience, as well as, budget and targeting.
At the same time, a single campaign can have multiple ad sets that allow you to test multiple ads and get the best one from it and modify those ads for better conversions.
Step 5: Getting your ad sets ready
The next step is getting your advertisement set ready. However, This step is one of the crucial steps that should be done right after creating your campaign.
In this section, you will have the freedom to choose the audience that you want to target, also, the budget you want to spend for your ads, and the placement of your ads within Facebook.
You will have the opportunity to play around with the options available in this level.
In the ad set, you can target your audience based on their interest, as well as, their location, demographics, custom audience, and more. It also grants you the ability to choose where you want your ads to be seen.
However, if you don’t want to mess around, you can choose the automatic placement and Facebook will get the job done for you.
Step 6: Choosing your ad creative
This is the final step on how to run a Facebook ad. Over here you will have to come up with an image or a video that is going to be shown as the ad in front of the users. The ad should be so attractive so that the targeted audience engage with your ads.
You want to make sure that the creatives you choose your design for your ad are attractive, effective, and suggestive of your product.
When creating the ad you will have the option to select the Facebook business page, as well as, the Instagram account that will represent your ads. Facebook advertising is quite different from traditional advertising and they even provide ad creative that is already embedded in them for the conversions.
Tips to create Facebook ads for lead generation
1. Test, Test, Test
Over the years, perhaps the most common mistake we’ve seen is failing to create multiple designs. Normally, businesses create one ad, and therefore it just plods along getting average results. Instead, you should create three or four different designs. By doing this, you’re opening yourself up to more success because you can test different designs.
If you also produce different copy, you’ve got various combinations to try. Over time, you’ll learn what copy, as well as, designs get the best results and you can stick with these themes in the future. Don’t just produce one ad and then get frustrated when it doesn’t yield the results you expected.

To know more about FB lead ads
read this
2. Don’t Forget Graphics
When scrolling through Facebook, colors and pictures catch the eye. Don’t forget that the user may have had a long day at work so they’re tired, and they’re endlessly scrolling through their feed. How are you going to grab their attention?
Also, if you haven’t used Facebook ads previously, we recommend doing some research and looking at ads that catch your own eye on the platform. All these kinds of stuff make Facebook ads for lead generation a great tool. Typically, you’ll find some common themes like logos, bold text, icons, images, etc.
Lastly, if your ad is just a block of text, you can almost guarantee that it will be bypassed every single time.
3. Evoke an Emotional Response
When it comes to making purchases online, it’s fair to say our emotions play an important role. Therefore, You could list out all the brilliant features that your product/service offers, but this isn’t going to get an emotional response. Instead, you should depend on the fact that your products will allow users to do things like save time, money, or effort or increase their quality of life.
What is it that your product offers? How is it going to improve their life? This is how you get people interested in your brand. Of course, there’s nothing wrong with addressing the rational side of the purchase, but telling the prospective customer how you’re going to make their life easier will immediately capture their attention.
4. Include a Call to Action
What do you want the reader to do? We’ve seen some amazing ads that didn’t convert because they didn’t encourage the reader to take action. Once again, you can learn different ways to do this by looking at ads that appear on your own Facebook account.
If your product is a big-ticket item and you’re worried the price will turn people away, you can replace this with the number of money buyers that can save as well as news of a special offer. As long as there’s a value proposition and the customers understand what they will get in return, they’ll take action, and then it’s up to your landing page to do some more selling.
5. Be Consistent
What’s the first thing you would say about Coca-Cola from a design perspective? For most of you, it would be the choice of red. Over the years, the color has become synonymous with the brand due to its marketing efforts. No matter what kind of advertising they are doing, they always have the same design aspects. This is true of packaging, as well as, billboards, sponsored events, TV ads, leaflets, and every other marketing material.
Elsewhere, we could associate the color green with Starbucks and perhaps even yellow with the ‘M’ of McDonald’s. Therefore, this is the power of consistent design and something you should consider with your Facebook Ads. If somebody likes your ad, as well as, your clicks ahead, the landing page should have similar design features including color, logo, and maybe even font and the style of writing.
However, If people are sent to a website that doesn’t resemble the advert, they’ll almost feel cheated and you’ll lose the lead in seconds.
6. Text and Images
Although we’ve mentioned the importance of images previously, we want to briefly talk about the relationship between the text, as well as, images. Because of the 20% rule, the amount of text you place on an ad is limited. Therefore, your design needs to cleverly integrate all of the most important features.
Often, the image will be the first thing that people spot while scrolling down the page. However, it’s the text that really brings it all together. Images create intrigue whereas, the text tells the story.

Since the text is limited, this is where icons and logos can really show their value. For example, a sports channel will use the logos or emblems of the two teams when advertising a game rather than writing their names in the text. Just like that, you can use your company logo rather than writing your name, the ad will instantly look cleaner.
All things considered, play around with designs as much as you can and get your logo, text, and images working together. If you’re able to bring them all together to form one cohesive advertisement, then you’ll be on your way to generating some leads.
7. Social Proof
Next is social proof. What does this mean? People will follow the actions of others when online. Let’s take an example, what would you be more likely to buy: an Amazon product with 2,000 reviews or one with five reviews? To enhance your social proof you need to connect with people on a social level. This can be achieved in two ways:
- By using a well-known face
- or an everyday individual
Of course, we can’t all afford the likes of Will Smith and Margot Robbie. Fortunately, this isn’t a problem because the consumers also relate to a brand that uses ordinary people. Suddenly, they see people just like them and therefore they feel a connection. So, consider taking advantage of this emotion and using real people in your ad.
8. Offer Something for Free
However, coming to the next step that is Free. In today’s competitive environment, there’s a magical word that’s almost guaranteed to improve your conversion rate: ‘free’. We aren’t saying you need to give products away and hence make a loss.
But you can still offer something. You could offer a free accessory with the order or a free eBook, or even free shipping? When we see the word ‘free’, we’re like meerkats — we sit up and pay attention immediately.
9. Use Customer Testimonials
In a similar way to images of people, audiences also resonate well with customer testimonials. When seeing people talk about how your product or service helped them, prospective customers start to think ‘maybe they can help me too’. When there is a video or image of a genuine customer talking about your brand rather than a clear actor, testimonials work greatly.
10. Generate Urgency
As our tenth and final tip, many ads that convert have another thing in common; they create a sense of urgency in the mind of the reader. By making use of phrases like ‘SURPRISE OFFER’ or ‘LIMITED TIME ONLY’ or ‘WHILE STOCKS LAST’, you’re almost forcing people into a decision. Consumers don’t like to miss out on great deals.
What is Facebook Pixel?
Many small businesses create campaigns using the Facebook Ads Manager but don’t understand how to get the most out of their Facebook ad experience.
This is usually because they are targeting only new prospects and aren’t fully aware of the depth of Facebook’s targeting ability.
Therefore, The truth is that re-marketing through Facebook custom audiences usually yields the highest gross return on investment (ROI).
To properly set up both Facebook remarketing and Facebook conversion tracking you don’t need to be a programming expert.
How conversion pixels work
In simple terms, a conversion pixel is a tool that measures a specific action a prospect took as soon as a person clicks on your Facebook ad.
Firstly, this action can be anything from taking your lead magnet, putting a product into their shopping cart, to actually purchasing.
A conversion pixel also lets you know which ads are working and the true ROI of each campaign you run.
Conversion pixel measures the total number of conversions, as well as, how many people the ad reached, how much you spent, and the average cost per conversion.
For instance, let’s see that you want to track one Facebook advert to measure how many direct sales it produced. To do this you would place a conversion pixel on your thank you page (as it’s only possible to reach this page once a customer has completed a transaction).
Each time a prospect clicks your Facebook ad and makes it to the thank you page, they will be tracked as a conversion. This is how it all works.
Therefore, a conversion pixel is a small piece of code that you can copy and paste onto the page you want to track.
However, if you have someone who handles your website, they will know where it goes, if you don’t, Facebook gives you step-by-step instructions on how to do it yourself:
However, there is no limit to the number of conversion pixels you can create. Ideally, you would want one for each step of your sales funnel, in order to measure its success and to find bottlenecks that stop prospects and customers from reaching the next stage.
Setting up a conversion pixel
To setup a conversion pixel, head to the Facebook Ads Manager, then select Tools and Conversion Tracking:
You can track a number of different conversions, these include:
If you’re looking to track people who place items into their basket but don’t purchase, you should select Adds to Cart.
When wanting to track how many sales have been made, then Checkouts is preferred, while Registrations and Leads are commonly tracked to measure opt-ins.
After you select what you want to measure, click on Create Pixel and you will be given a code. Then place it on your website.
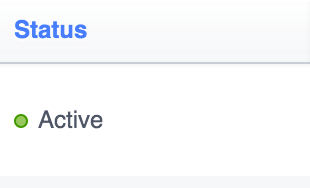
Once your code is placed on your website, visit Conversion Tracking through the Facebook Ads Manager and ensure it’s up and running:
The above picture shows 5 conversion pixels and only one is active (the other 4 were just tests). If you don’t have someone managing your website and you use WordPress, then the Facebook Conversion Pixel plugin will add your pixel without you having to mess with the code.
However, if you’re not using WordPress and are having trouble installing your pixel, simply visit the Chrome Store and download FB Pixel Helper for free.
This tool will troubleshoot what’s going wrong and how to fix it.
Note: You must be using Google Chrome to use the FB Pixel Helper.
Setting a value for conversion pixels
As a default, each conversion is tracked at $0.00. It’s best to change this amount to what your product actually costs.
Let’s assume you sell a single product priced at $99. So, you want to value each successful conversion at $99.
In order to achieve this, you simply need to edit your conversion pixel.
Below is what a typical pixel code will look like. Also, I’ve highlighted the numerical value “0.00” which is what you need to edit:
You can also replace the ‘0.00’ to the value of your product. In this case, we would change ‘0.00’ to ‘99.00’.
Each time a Facebook ad makes a conversion, the conversion will be valued at $99 instead of $0.
How custom audiences work
Facebook custom audiences allow you to create a group of targeted prospects (based on your parameters). They can be segmented by age, gender, as well as, other interests, and more.
For example, let’s assume a prospect visits your website, views a specific product page, and leaves without purchasing. Facebook custom audiences can track that prospect and also can place them in a list. Now let’s assume 10,000 shoppers visited the same page, and 9,000 left without buying.
Finally, you now have a custom audience of 9,000 prospects who you can show a highly targeted advert (the product they viewed).
And also you can use re-targeting to get them to complete the action.
Just consider that you have visited Vidyard recently, however you did not opt-in to their list or purchase or any products. And guess what? You are tracked in their custom audience and you will be re-targeted on Facebook as well.
This is how custom audiences work.
How to set up a custom audience
Setting up a custom audience is simple. Head to the Facebook Ads Manager and select Tools and then Audiences:
On the Audiences page, firstly go to Create Audience and select Custom Audience:
Then select Website Traffic (in this example we are tracking website visitors):
Next you will be asked who you want to track:
This will depend on your goal and what you want to measure.
Firstly, keep in mind that you can only create one custom audience per Facebook account. It means you’re only allowed to place one custom audience pixel on your website.
You can track prospects from 1–180 days before they are removed from the custom audience. If your website receives thousands of views per day, it’s better to reduce the number of days to track. This ensures that the prospects in your list have your business fresh in their minds.
If your website doesn’t receive too much traffic, then increasing the number of days to track is better to get more impressions.
Lastly, after you click on Create Audience, you will be redirected to a page where you can get your tracking code and place it on your website.
Then, place the code in the header or footer of your website.
Why should you use conversion pixels and custom audiences
It can be difficult to know whether your last Facebook ad was a success or failure without the help of any tool. Conversion pixels help you understand the actions prospects take when they click your ads. Also, whether the copy, heading, or targeting options are working.
Custom audiences are great because data has shown that there’s a 70% greater chance of increasing conversions through re-targeting than cold advertising.
Firstly, creating ads on the fly, targeting random prospects to buy your products is going to be hard. Because your business has next to no social proofing, so they may not trust you or even be interested in your product or service.
Therefore, this is the perfect recipe for utilizing the marketing budget and seeing very a good return on investments.
Leveraging Facebook custom audiences lets you place ads in front of prospects who are most interested in your brand. Therefore, this type of prospect is always going to be easier to convert.
What to do when the Facebook pixel is not working?
Sometimes Pixels are not installed properly. This results in receiving errors after set-up. Here’s what you can do to fix it:
The Facebook Pixel Helper is a tool that helps you get some important info on your Facebook Pixel. Using this tool you can verify if your pixel works properly, as well as, troubleshoot common errors. Also, you can learn how to improve performance.
Whenever you first create a pixel, you need to activate it. And to do this, you actually embed the code onto the desired page. Then, visit that page to get the red dot next to the pixel to go from red (no activity yet) to green (active) in your ads dashboard.
Sometimes, however, even when you do this and the status indicator stays red (no activity yet).
You might notice something “off” about your reports and wonder if something isn’t working properly after an ad has run.
When that happens, you need a way of understanding what’s going on with your pixel. That’s where the pixel checker tool comes in.
Pixel Checker Tool
This tool is only available in Google Chrome. But if you’re using Power Editor you should be using that as your browser already.
Firstly, Install the tool. You can do by clicking the “Download Now” button on this page: https://developers.facebook.com/docs/facebook-pixel/pixel-helper
Once you have it installed, you’ll see an icon like this </> in your browser window (top right corner of Chrome, by the URL bar).
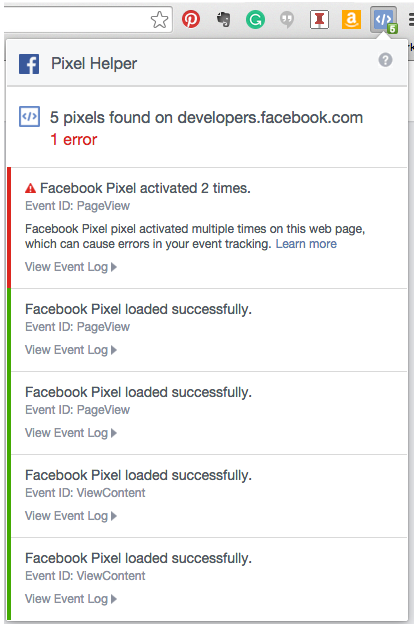
When a page has a Facebook Pixel installed the </> icon turns blue and a number appears telling you how many pixels were found on the page.
If the icon does not turn blue, then there are no Facebook pixels installed on this page.
So, click the </> icon and a popup box appears with information about your pixel(s) — sort of an event log. If there are any errors, you can click to learn more about the issue and how to fix it.
For a deep dive into troubleshooting common issues with pixels, visit the Facebook help section here.
Final Thoughts
If you’ve ever used Facebook ads for lead generation or any other form of paid online marketing, observe how your last 3 campaigns were. Were you happy with the results and investment? Or were results poorer than you’d hoped?
Using custom audiences and conversion pixels is pretty straight forward. It takes less than 10 minutes to set up and provides some of the best PPC returns online.
Even if you don’t plan on running Facebook campaigns soon, there are zero downsides to setting up a custom audience pixel on your website. You can set it up today to build a highly targeted Facebook list.
Facebook ads for lead generation are very effective and economical. Facebook ads have a lot of options to choose from and play around. If you take your time and put effort into learning Facebook advertising, then you don’t need a highly paid agency to run ads for you. However, there are some technicalities that only an expert in the field of digital marketing would know of.
A digital marketer or an agency would take a load off you by doing all the technical work for you and fulfill your marketing needs. But finding the right digital marketing agency is really important. We, at AAJneeti, understand our client’s needs and provide the best results in the given budget. We are among the top lead generation agencies in Delhi/NCR. If you need any help related to digital marketing, feel free to contact us! Just click here.