What is Conversion Tracking?
Think of a scenario where on a bright summer noon you enter a Café and sit for a while to enjoy the Air Conditioner. It is merely a minute when the waiter shows up and asks you to order cuisine. You ask him to wait up and start exploring the menu. The moment you feel refreshed with the air you just leave the Café with nil profit to the Café Owner. Well, he didn’t face a loss though, but you understand how different is advertising the products from tracking the actual sales induced.
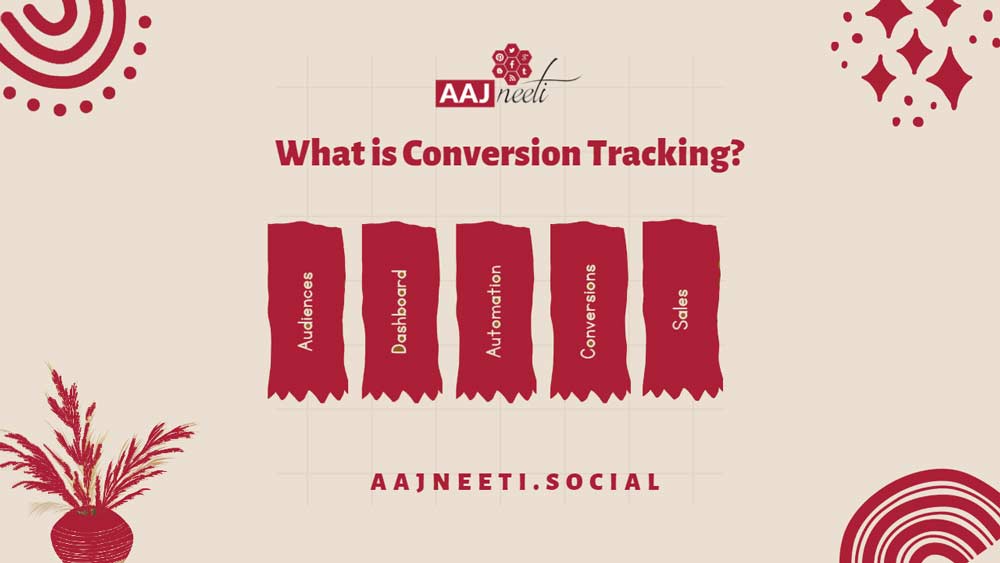
At par, the only aspect that will matter for your progress will be the total products you sold rather how much time they bashed in towards the customer attraction. Conversion tracking helps you track such interactions between the customers and your advertisements. It will keep a track of the customer whether he purchased a product, subscribed to a service, signed up for your newsletter, or downloaded any element the advertisement was created for. When a successful action is recorded for your salient product, such actions are defined to be the conversions.
Why should we use Conversion Tracking?
- To observe the most suitable keywords, advertisements, ad groups, or campaigns a particular customer type would love to dive into.
- For analyzing your Return on Investment (ROI) and improve your decisions about efficient advertisement spends.
- To use Smart Bidding Techniques like Maximize Conversions, target CPA and target ROAS that use machine learning strategies to enhance your campaign focused on business goals. Click here to learn more about bidding strategies.
- To keep a track of customers and different devices which they might be using to interact with your advertisements. This helps in defining the aspects of whether a customer interacting with the advertisement on one device makes a conversion on the same on with a different device. Options to viewing Cross devices, Cross Browsers, and several other conversion data from All Conversion panel.
How does Conversion Tracking work?
To start tracking the conversions for all your advertisements you need to start with creating a Conversion action in your Google Ads account. A salient activity performed by the customer which is profitable to your business is termed as a Conversion action. Conversion tracking can be used in tracking the following types of actions:
- Website actions: Any purchase, signing up, and other remarkable actions which the customers are intended to complete on your website. You can learn more about how does Google Ads tracks website conversions here.
- Phone calls: Any calls recorded to have made from your advertisements, or to a number mentioned on the website, and total clicks on the phone number mentioned on your website. You can learn more about phone call conversion tracking here.
- App installations and in app purchases: Successful installations of your App in Android or iOS, and track of all the in app purchases made within all those apps. You can learn more about phone call conversion tracking here.
- Import: All the customer actions that were initiated online but will end up in an offline environment. For example, if a customer submits his details online and later visits you to verify physical documents.
- Local actions: All those actions performed by a customer focusing on a physical store or location.
Working of Conversion Tracking Process
All the conversion tracking processes work uniquely for each conversion origin, but for every type besides offline conversions, they tend to fall under one of these listings:
- You begin with embedding a conversion tracking tag, or a code snippet into your website or mobile application code. Whenever a customer clicks on the advertisement either from the Google Search, a selected Google Display Network site, or if they view it through a video ad, a temporary cookie downloads on their Computer or Mobile. When the actions you defined is completed by them, the program recognizes the cookie through the snippets added by you, and a conversion is recorded.
- Some conversion tracking does not require tags. For example, for tracking the phone calls from call extensions or call only advertisements, you may use a Google forwarding number to track whether the call came from one of your advertisements, and for tracking the details about call durations, start and end timings, and area code of the caller. Also, the app downloads, in app purchases from Google Play, and local actions are automatically recorded as conversions, which does not require a tracking code.
Once conversion tracking is set up, you will be able to track the data for your ad groups, campaigns, advertisements, and keywords. Observing this data within your reports will help you in understanding how your advertising will help you in achieving prime goals for your business.
Different ways to track your conversions:
When your ad runs with Google Ads, you might be wanting to see whether the clicks on your advertisement made the customer to take any action over it, like a purchase, call, or download of an app.
The initial step in tracking the conversions is to choose what you are planning to track.
Choosing the conversion type, you’re planning to track:
- If you’re planning to track the website purchases, newsletter subscriptions, button clicks, or any other website activity, you need to set up conversion tracking for your website.
- If the domain you want to focus on is the App downloads and the in app purchases then, you need to choose among the below:
You can learn more about mobile app conversions, here.
- If the App or web conversions from a Google Analytics App and the web is your set area, you can choose among the below:
- Measuring all the web conversions from the Google Analytics App and web properties.
- Measuring app conversions from the Google Analytics App and web properties using Firebase SDK.
- The phone calls can be tracked by the following:
- Tracking phone calls from advertisements
- Phone call tracking to a phone number on your website
- Tracking the total phone number clicks on your mobile website
- Offline conversions like store visits and phone calls can be tracked via Tracking offline conversions.
Tracking multiple conversions at once:

If you need to track multiple conversions from the above mentioned, you can simply set up a different conversion action from each conversion type you’re planning to track. For example, you can set up an action for tracking offline conversions and a different action for tracking the App downloads and purchases. You can also set up multiple actions for each source of conversion. Let’s say you need to track two different actions on your business website, namely the purchases and the subscription to the newsletter. You could set up two different and unique actions one for the purchases and the other for the subscriptions. If you are tracking multiple actions at once, you might be needing to use Include in Conversion to choose which conversions to include in your reporting column. You can surely learn about “Include in Conversion”, here.
Setting up conversion tracking for your own website:
Conversion tracking helps in tracking the efficiency of your advertisement, about how many successful conversions were made after clicking on the advertisement. Now let us begin with setting up the conversion tracking for your website. We will start with the Google Ads account and then after we receive a tracking snippet namely a ‘tag’, we will make it up to adding the tag to your website.
Before beginning any of the following steps
You will need the below mentioned prerequisites before setting up your website conversion tracking:
- Website: Well obviously to add a tag to a website you will be needing the website into which you can embed the tag.
- Access to website source code: The tag is directly embedded into the source code of your website and to embed it you need to be able to edit the source code.
Let us get going by creating the conversion action:
Step 1: Creating a conversion action
- Sign in to your Google Ads account.
- Open tools, go to measurements and click conversions.
- Click on the plus button and select the website.
- Enter a title for your conversion next to Conversion name.
- Select a description for your action next to Category.
- Next to the Value option, select the approach to track the value of each conversion. You can choose to enter the same value for each conversion, different value for each conversion, or not using a value at all.
- Next to the Count option, choose how to count these conversions. You can choose either one conversion per ad or every conversion which will likely add value to your business profit.
- From the Click through conversion window, select from the dropdown, how long to keep tracking after an interaction.
- From the View through the conversion window, select how long to keep tracking the conversion from the dropdown.
- Click on the Include in the Conversions.
- Lastly, click on Create and continue.
A screen with the acknowledgment of your successful creation of conversion action will be displayed.
Step 2: Setting up the Conversion Tracking Tag
![What Is Conversion Rate Optimization? [FAQs]](https://blog.hubspot.com/hubfs/00-Blog_Thinkstock_Images/percentage.png)
For initiating website conversion tracking for the first time, you will be needing to add two snippets of code into your website, namely the Global site tag and the Event Snippet.
Global site tag adds all your website visitors into your All visitors remarketing lists and sets up new cookies over your domain, which will be storing the information about the advertisement clicks which brought someone to your website.
Embedding the Global site tag into each website page should do you good but only one Global site tag will be needed for each Google Ads account.
Event Snippet helps in tracking the actions which are to be counted as conversions. Embed this snippet to only the pages you want to keep track of. Each action has its own unique associated event snippet. The Global site tag on the other hand is the same across all conversions under one Google Ads account.
Installing the tags:
Option 1: Installing the tag yourself
- Select the best suited action under the Global site tag and follow the instructions hence provided.
- I haven’t installed the global site tag on my website:
This option should be chosen if this is the first time you are setting up the tag in your account if you haven’t installed any global site tag from some other Google Product.
This tag can be installed by copying the below tag code and pasting it within the <head> </head> tags of each website page.
This is an example of a global site tag, where “YOUR_CONVERSION_ID” stands for the conversion ID that’s unique to your Google Ads account:
<script async src=”https://www.googletagmanager.com/gtag/js ?
id = YOUR_CONVERSION_ID ” > </script>
<script>
window.dataLayer = window.dataLayer || [];
function gtag(){ dataLayer.push ( arguments) ; }
gtag( ‘js’ , new Date() );
gtag( ‘config’ , ‘ YOUR_CONVERSION_ID’ );
</script>
- I installed the global site tag on my website from another Google Product (ex: Google analytics) or another Google Ads Account:
If this is your case, then you will not be needing to add another Global site tag to the website. However, in order to allow conversion tracking to work here, you will be needing to add the config command to every instance of the global site tag.
gtag(‘config’, ‘YOUR_CONVERSION_ID’);
Add this command to every instance of the global site tag just above the </script> tag.
- I already installed the global site tag on my website when I created another conversion action in this Google Ads account:
In this case, you do not need to worry about adding the global site tag again. But please make sure that the global site tag is appearing on each page of the website and the config command is containing your account’s conversion ID.
- Now copy your global site tag and just follow the instructions to add it to the website.
- Next to the Event Snippet option, select if to track conversions on a page load or by a click.
- Page load: It counts the conversions on the visit of the customers on the conversion page. For example, a confirmation page for the subscription. This is also the default option.
- Click: It counts the conversions if a button is clicked by the customers.
- Simply copy the event snippet and just follow instructions to add it to your website. You can choose to Download a snippet to add it later.
- If you choose to track using the page load, add the event snippet to the following page.
- If you choose to track using a click, add the snippet to the page having buttons or links you would like to track for the clicks.
- Click Next and then Done.
- If tracking the clicks on the website, please follow the instructions in the Track clicks on your website as conversions. This step is essential.
Option 2: Using the Google Tag Manager
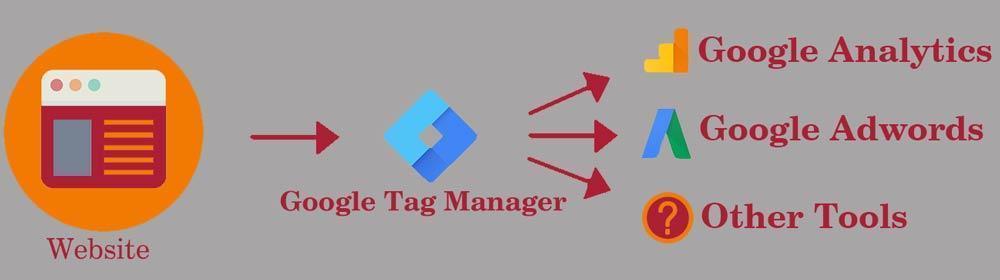
Google Tag Manager is a tag management system offered by Google for allowing you to efficiently integrate the tags and snippets of code to your website. To use a Google Tag Manager for installing the conversion tracking tag.
- Copy your Conversion ID and the Conversion label for your conversion action.
- Now follow the instructions to set up the Google Ad conversion tracking.
- Click Next and then Done.
- If you are planning to track the clicks on the website, just follow one of the options below:
- Basic: Just set a click trigger which activates on registering a click.
- Advanced: You need to add a functional call to the code for the link or the button. Then simply set a custom event trigger which activates on registering an event, here a click.
To use Google Tag Manager to install such tag you will be needing a Conversation ID and a Conversation Label. This can be found within the event snippet for your conversion action.
< !– Event snippet for Example conversion page — >
<script>
gtag( ‘event’ , ‘conversion’, { ‘send_to’ : ‘YOUR_CONVERSION_ID/YOUR_CONVERSION_LABEL’ ,
‘value’: 1.0, ‘currency’: ‘USD’ } );
</script>
If you are still confused about ensuring a successful tag set up, use the Google Tag Assistant.
How to begin with setting up the Conversion Tracking in Google Analytics:
When you log into the Google Analytics account, look for Admin at the bottom of your left hand sidebar menu. Clicking it will bring you to a page where you will find three partitions defining the Account, Property, and View lists. Under View find and click the Goals option.
Now when you have selected to create a Goal, you can get started with the preconfigured templates that are usually split into four categories, namely Revenue, Acquisition, Inquiry, and Engagement.
Let us assume that you run a website that deals with the Digital Education platform. Raghav visits the website and starts watching a video. He likes the video and subscribes to a trial subscription. To move on with the further implementations we will be needing some goals. So, let’s get into creating some Goals.
Firstly, we will be tracking the video view by selecting an Engagement Goal. The Engagement oriented Goals like video views will be tracked as a new event. On clicking Continue your Event options will pop up. Here, you will be needing to add the labels to describe what the event is tracking. This begins with three major categories which will converge as we go deeper.
The major categories
- Category: This defines the object you are tracking. For example, a Video File, link, etc.
- Action: This defines the activity of the customers about what they are currently doing.
- Label: This defines the details you want to capture from the customer. For example, some answers, the title of a video playback.
While reaching the end make sure to select a Yes to make sure your Goal values inherit the Event values. This will help you track back the information later to observe where did they originate from. Now that the new video view is set up, we can now move on to creating the Goal for the Macro conversion. Rollback and select Acquisition.
The Goal type here will be a Destination Goal, where you must insert an URL for the Acknowledgement page someone will land after they submit the information.
Here’s how:
Firstly, drop in the URL for the Thank You page (excluding your root domain). For example, https://aajneeti.social/thanks should be simply /thanks.
You have two optional values below:
- Value: An amount based on the value of the new sign up. If it is technically free, you can also use a placeholder like 1$/subscriber.
- Funnel: If you need to specify that a conversion goal is only tracked on registering someone’s click on every single page, you specify in the sequence.
Lastly, click the Verify link on the bottom before saving to make sure to test and see if you have set up the Goal correctly.
In the left sidebar, select Conversation, Goals then Overview to begin. In just a few days you should see some nice notched within your Graph. But this is just the beginning as the only reason to track something in the first place is that you can do many things with that information.
Understanding the reality
Unfortunately, most of the website’s visitors might not convert, which seems to be a bitter truth we have to taste out. About 98 percent of visitors are simply browsing, scrolling, peeping in, and viewing. But when we compare their actions against the ones who did convert can really be embellished. It will show you the specific micro conversions which contribute to eventually convincing someone to raise a toast.
There can be an infinite way to describe why one converted and why the other did not. Let’s compare the Convertors with the non converters to understand how Events efficiently lead to conversions.
Move onto the Segments in the Audience overview and select Convertors and Non-Convertors. It will show the activities of the users coming from a different existence with different tastes and expectations.
Google Analytics will allow you to track conversions on both aspects be, it a Hard Goal or a soft one. At last, both are interrelated, and one is needed to work efficiently with the other one.
Setting up a Google Analytics Property:
You are free to add up to 50 properties to each Google Analytics Account. Please contact your account manager to extend the limit.
You will be needing the edit permissions on the account to add any properties. To start setting up the property:
- Sign in to your Google Analytics account and go to the Admin panel.
- Use the menu in the Account column to select the account you want to add the property in and click Create a property in the Property column.
- Select the web and enter the Name for your property.
- Enter your website URL and select the protocol for it. Enter the domain name with no characters following your domain name. For example, www.aajneeti.social, and not www.aajneeti.social/
- Select your Industry category which will be used by Google when you choose to share benchmarking data.
- Select your Reporting Time Zone. It will be used by the Analytics as an identity for your reports regardless of the location from where it originated.
- Click Create and Accept the Analytics Terms of Service and of course the Data Amendment.
- Click Finish.
Setting up your Google Analytics global site tag:
- To initiate this sequence, you will need to create a Google Analytics property (which we created just in the above section), for every website you want to collect the data from. Creating any property generates a unique Tracking ID and Global site tag which includes the Tracking ID for that particular property. To get help in finding your Tracking ID and the Global site tag, read this.
- Copy your Global site tag and paste it just after your <head> tag on every page you want to get track of.
Finding the Tracking ID and your Global site Tag:
- Sign in to your Google Analytics account, click Admin, and select an account from the menu in the Account column.
- From the Property, the column selects a property from the menu.
- Under the Property section, select Tracking info, and then Tracking Code.
- Your Tracking ID will get displayed on the top of the current page.
Your Global site tag will be displayed down the page in a text box under Website Tracking -> Global Site Tag (gtag.js).
Setting up Data collection based on the type of your website:
The methods of collecting the data in Google Analytics vary depending on the type of website you are using.
Static Website:
A static website will not generate HTML using a programming language or an interface such as Python or PHP. To collect such data, you will be needed to copy and paste your Global site tag into the source code on each webpage you want to get track of.
- Just find the Global site tag for your property, and copy the code.
- Paste the code unchanged just before the ending </head> tag on each page you want to get track of.
You can learn more about how to collect and send the data from webpages to multiple Analytics properties, here.
Dynamic Website:
A dynamic website will generate HTML using a programming language or an interface such as Python, PHP, etc. To collect the data, you must include the global site tag in the source code for each webpage you want to get track of.
- Just find the Global site tag for your property, and copy the code.
- Paste the Global site tag by creating its own include file.
- Finally, link the include file to allow the snippet to appear before the ending </head> tag on each webpage you want to get track of.
If you are coding with PHP:
- Just find the Global site tag for your property, and copy the code unedited.
- Paste the global site tag into a file and name it analyticstracking.php and include the file on each PHP page.
- For every PHP page, after the opening <body> tag immediately add this code:
<?php include_once(“analyticstracking.php”) ?>
You can always update the global site tag for dynamic websites in a more efficient way by using Google Tag Manager.
Web hosting services:
In this case, you do not control the source code of the page. Many Internet Service Providers and hosting platforms like WordPress, GoDaddy, Wix, and Weebly simplify the global site tag installation by offering the plugins which automatically install the Analytics on the Webpages you need to get track of.
Here are some Analytics implementation instructions for the major providers:
Please take into consideration that whenever you use a plugin to collect some data, you might not have an option to add configuration settings for customization of the data you want to get track of. Please review how to get started with Analytics here.
Website using Google Tag Manager:
The Google Tag Manager is a free tool to help you with adding and managing the multiple analytics and site tracking tags. To use Google Tag Manager for installing the global site tags, please read the Google Tag Manager setup and the Installation guide, here.
Verifying if your global site tag is working:
To verify if the tag is working, you must visit the website and check for the Real-Time reports in the Analytics to verify whether your page was registered or not. Also, you have an option to use Google Tag Assistant for determining if the tag is implemented correctly.
You can also download and learn more about using Tag assistant, here.